At the Farmer's Market, we brought home a box of apples for baking.


I started out peeling, coring, and slicing with my handy apple peeler, corer, slicer to freeze the apples. While I was in process, Jenn decided she'd like a crisp.

Gluten Free Apple Crisp: (please see a better GF apple crisp here)
Preheat oven to 350 degrees
Grease 8x8 baking dish
- Fill baking dish half way with sliced apples (some people prefer to leave the skin on) and set aside
To make the crumble, stir in a large bowl until moistened:
- 1/2 C gluten free rolled oats (we use Bob's Red Mill)
- 2-3 T vanilla rice milk (or soy or almond or whatever you have)
- set aside for 10 minutes
- 1/2 C gluten free baking mix (Namaste pancake or muffin mix or rice flour will do in a pinch)
- 1/2 C light brown sugar
- 1 t ground cinnamon
- Add dabs of 3-4 T butter
Rub oat/flour mix into butter with fingers until crumbly and moist. Add more rice milk if needed. Evenly spread crumble over the apples. Bake 30-40 minutes until golden brown and apples are tender but not mushy. Enjoy hot with a scoop of vanilla bean ice cream on top!
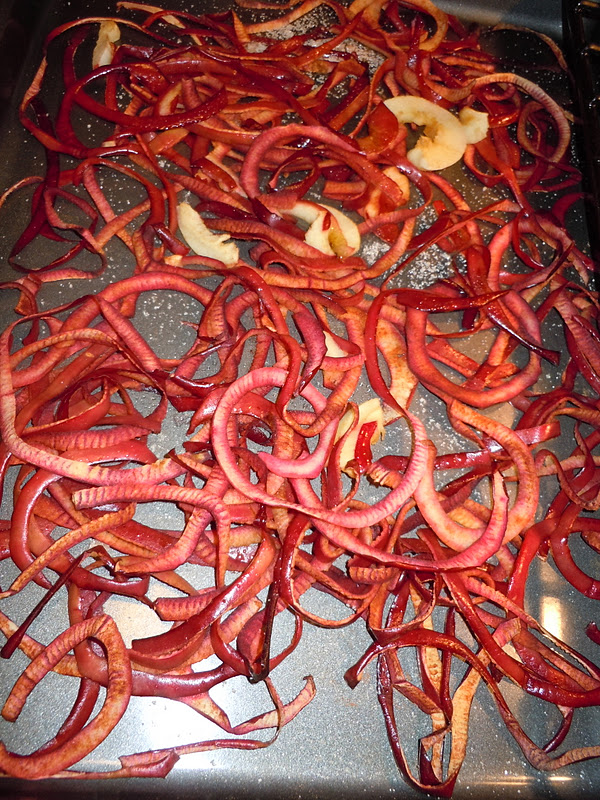
Cinnamon and Sugar Peels:
I had a bunch of peelings and cores left over. I could have composted them, but they were calling to me to do more. So I did an internet search to try to find ideas for using the peels and cores in clever ways.
DIY Apple Cider Vinegar
But what to do with the cores? Do it yourself Apple cider vinegar!!!


I put the cores and any leftover peels into a wide mouth jar.

Fill with water and cover with cheesecloth or towel. Then store in a warm, dark place. I marked the jar with the date and in 30-60 days, voila, DIY Organic Apple Cider Vinegar. I will keep you posted on how it comes out!

And, I still have half of a box of apples to work with. It's gonna be a pie, crisp, yummy winter.
Wowza, I can't wait to see (taste?!) how that apple cider vinegar turns out. Love the idea of DIY vinegar.
ReplyDeleteI tried this once, and I started seeing little vinegar flys all around my house. Forgetting that I had done it. Then when I found it again I had to bring the bowl outside and down the street to dump it out there were thousands of flies under the cheese cloth! oops. How did it go? Every September I drag my family out to the organic orchard down here and we pick 50 pounds of apples. I make tons of apples sauce and apple pie and apple this and that till they come out of my ears.
ReplyDelete